Documentation
*****THIS PAGE APPLIES TO LEGACY MODELS OF THE STEREO AND MONO COMPRESSOR. ****
***INSTRUCTIONS DEALING WITH TUBE REPLACEMENT AND NOISY TUBES, DO NOT APPLY TO THE NEW 12AU7 MODELS. ***
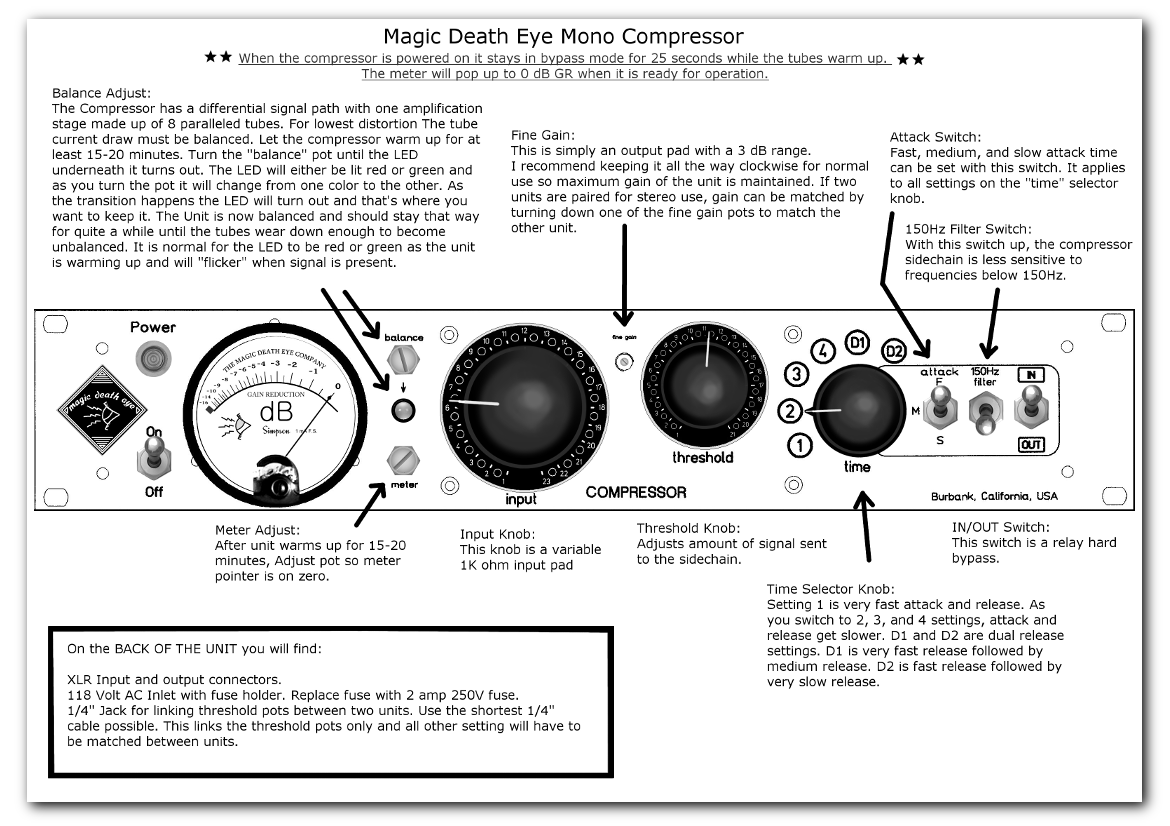 ^Click for larger image^

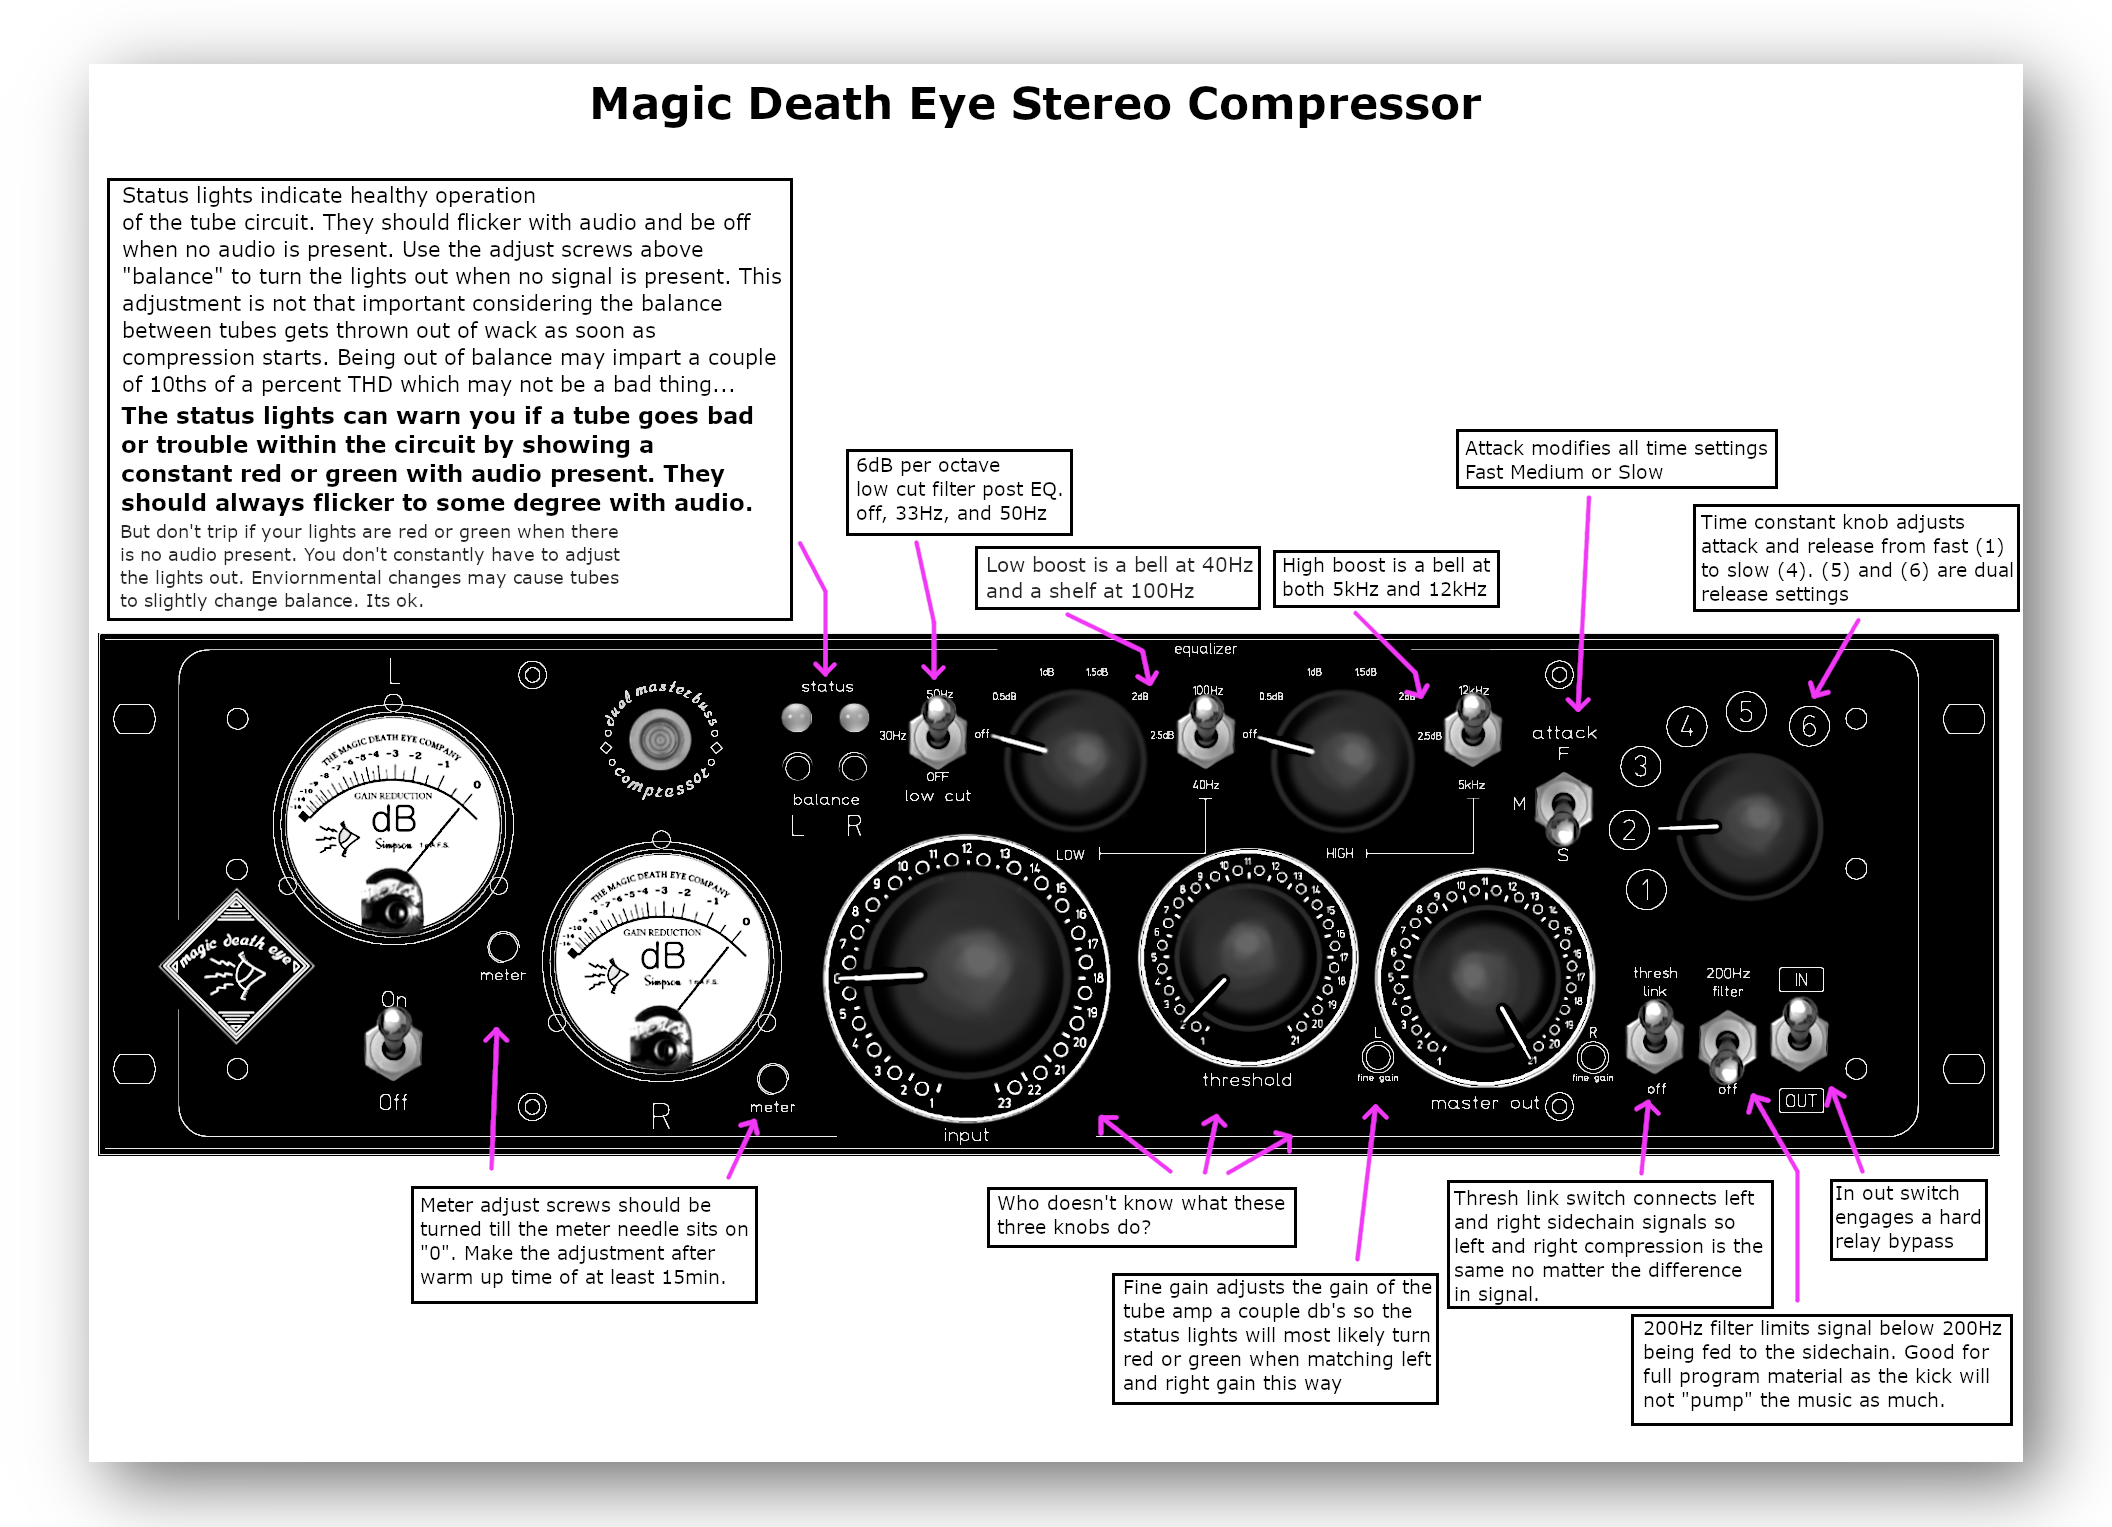
^Click for larger image^
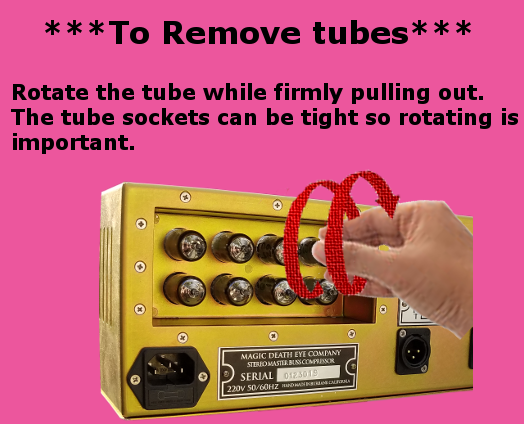
****Replacing Tubes****
***CAUTION***
***THERE IS HIGH VOLTAGE ON THE TUBE BOARD. BE CAREFUL WHEN ADJUSTING THE SMALL POT ON THE BOARD.***
***THIS ADJUSTMENT IS DONE WITH THE UNIT ON.***
NOTE: If you don’t feel comfortable sticking a small screwdriver on the circuit board pot don’t do it. Just set the big screwdriver adjust balance pot on the front panel in the center most position after replacing the tubes. The balance LED light will probably be either red or green with no audio. The color of the light has nothing to do with the sound. Just ignore it and let you ears decide when the tubes become unbalanced in the future.
1) Unplug the unit and take the cover off by unscrewing all the phillips screws on the top. Then remove the two top allen screws on the front panel, one above the input knob and one above the time constant knob. Remove top.
2) With a flat head screwdriver twist the front panel balance pot both directions to get a feel for where the center of the turn is. If it had a knob on it (it doesn’t) and numbers from 1 to 10, you would want to the knob to sit at 5. Leave it in the middle.

3) Remove the 8 tubes by slightly rotating them while pulling up. Put them aside.
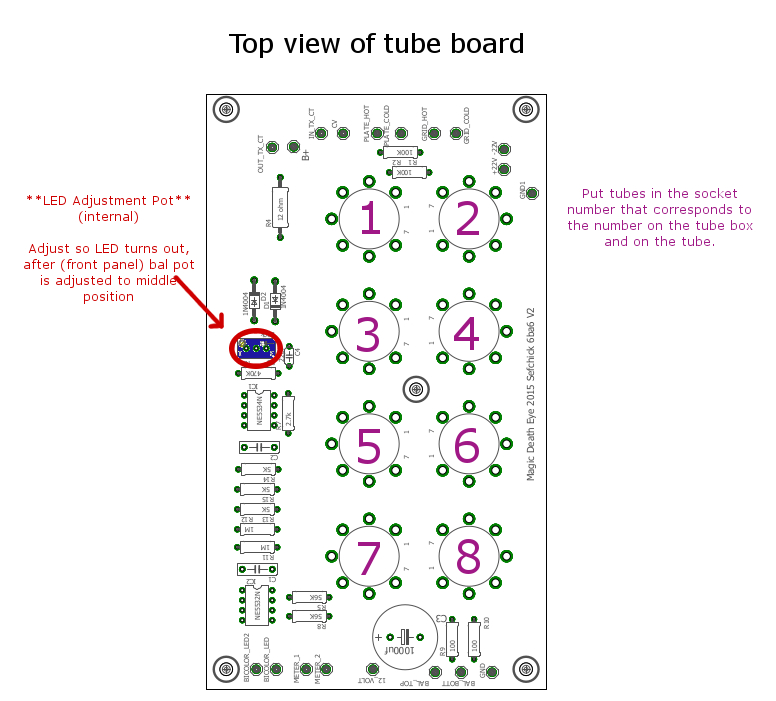
4) The new matched set of tubes will be numbered 1-8 in they’re boxes. Put them in according to the diagram below.
 5) Make sure all tubes are in firmly. Plug the unit in and turn it on. Let the compressor warm up for a good 15 minutes.
6) After warm up, the LED on the front panel will most likely be red or green. Use a small eye glass screwdriver to adjust the small pot on the tube board circled in the picture above. This is where you should be careful not to drop the screwdriver onto the tube board around the tubes since there is 200V on the board. Keep turning it till the LED turns off. If you keep turning it further the LED will turn the opposite color. You don’t want it to be red or green but right between the two colors and off. It may take many turns to turn the led off. If it wont turn off after 10 or so rotations, turn it the other way.
7) Turn the unit off and unplug it. Replace the top, all the phillips screws, and the two allen screws on the front. Your done.
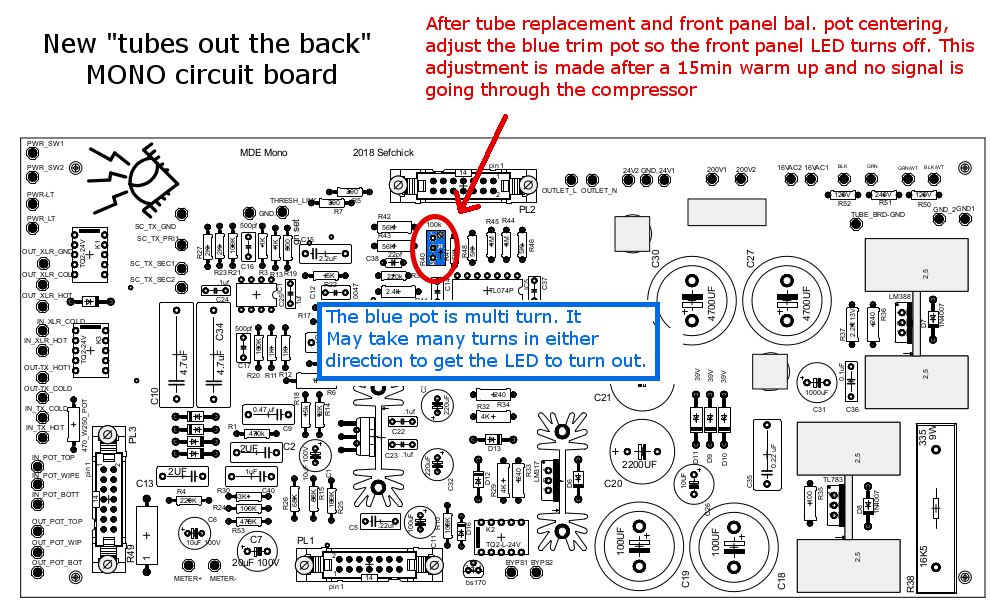
****New style – Tubes out the back****
Same basic principal as the old style. You must rotate the tubes in order to remove them. I recommend using electronics lubricant spray for re-installation of the new tubes. Spray some on the new tube pins before you put them in. It makes installation a lot easier.
***Balance LED adjustment on the new MONO version with the tubes sticking out the back***
Again, after tube replacement and front panel screw driver pot centering. Adjust the multiturn trim pot inside the MONO compressor until the front panel LED turns out.
***A word about tube matching***
The variable mu tube circuit needs tubes to be matched in order to be able to achieve deep gain reduction without “thumping” or “fluttering”. All 8 tubes don’t have to be matched perfectly. However, it is important that the two vertical tubes in the set of 8 match very closely.
The most common problem with the GE tubes I use is a “ticking” or “splatting” sound that sometimes starts to happen after a year or so of use. If the noisy tube can be found by gently tapping on each tube while monitoring the compressor pretty loud, you can just replace the vertical tube pair instead of the whole set.

****Stereo compressor complications****
With the stereo compressor, we want the two sides to compress the same and to achieve this, both sets of tubes must be closely matched. Its a bit of a hassle to replace 16 tubes so its best to sent the unit back to me at the Magic Death Eye castle so I can install both sets and calibrate the unit for best performance. Service is always free, the user only pays shipping and tube cost.
Adjusting the balance LED is a little more complicated as well. The balance pot is a multi-turn pot so it is harder to find the center after a new re-tube.
*****************************************************************************
****THIS VIDEO DOES NOT APPLY TO NEW 12AU7 MODELS****
Replacing noisy tubes video.